When it comes to ensuring the structural integrity of welds, especially those found in critical applications such as pipelines, pressure vessels, and industrial equipment, meticulous inspection methods are essential. Inside Corner Vacuum Box Bubble Leak Testing is a specialized non-destructive testing (NDT) technique that plays a pivotal role in detecting leaks and imperfections in welds, particularly in challenging inside corner joints. In this comprehensive guide, we will explore the world of Inside Corner Vacuum Box Bubble Leak Testing, uncovering its benefits, various applications, setup techniques, and essential tips to ensure accurate and reliable weld inspections.
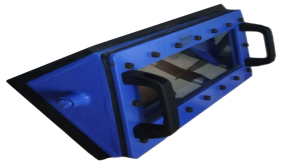
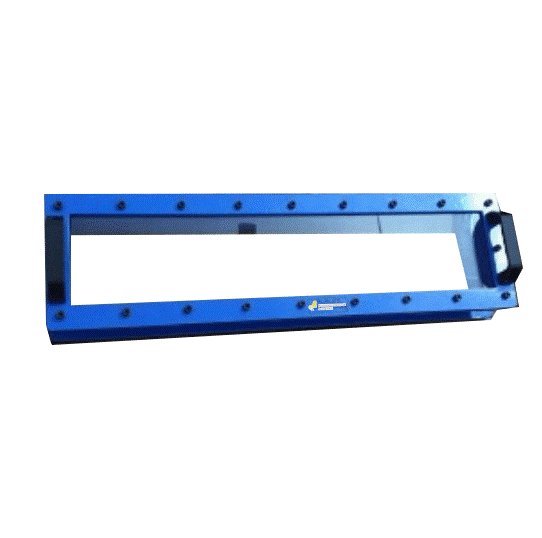
The Burhani Engineering Technology vacuum box has been designed for the operators according to API 650/653 recommendations. Bubble leak or vacuum box testing is an integral part of tank inspections as required by the American Petroleum Institute (API) and other international standards associations to establish the condition of tank bottom plate welds and shell-to-bottom plate welds.
Inside Corner Vacuum Box Bubble Leak Testing is a highly sensitive NDT method designed to assess the quality of welds, particularly in confined spaces and inside corner joints. This technique is especially useful for identifying leaks and imperfections that may be challenging to detect with other testing methods.
The process involves creating a sealed chamber around the weld joint using a specially designed vacuum box that conforms to the inside corner. A vacuum is applied to the chamber, and a liquid solution (often a soapy water mixture) is applied to the weld area. Any leaks or imperfections in the weld will allow gas to escape, forming visible bubbles on the surface of the liquid solution. The size, frequency, and location of these bubbles provide critical information about the weld's quality and any potential defects.

1. High Sensitivity: This testing method is highly sensitive, capable of detecting even tiny leaks and imperfections that may compromise the integrity of a weld.
2. Non-Destructive: Inside Corner Vacuum Box Bubble Leak Testing is a non-destructive technique, meaning it does not alter or harm the weld in any way. This allows for repeated inspections without compromising the weld's integrity.
3. Accurate and Reliable: The formation of bubbles is a clear visual indicator of defects, making this method accurate and reliable in identifying issues within the weld.
4. Versatile Application: Inside Corner Vacuum Box Bubble Leak Testing is adaptable to various industries and applications, including pipelines, pressure vessels, storage tanks, and more.
5. Cost-Effective: This testing method is cost-effective, as it does not require expensive equipment or consumables, making it a practical choice for routine inspections.
6. Quick Results: Inspections using this technique provide immediate results, allowing for prompt decision-making and necessary repairs or modifications.
7. Enhanced Safety: Ensuring the integrity of welds is essential in industries where safety is paramount, such as petrochemical, nuclear, and aerospace sectors.
 Applications of Inside Corner Vacuum Box Bubble Leak Testing
Inside Corner Vacuum Box Bubble Leak Testing is utilized in a wide range of industries and applications, including:
1. Petrochemical: Ensuring the integrity of welds on pipelines, storage tanks, and pressure vessels is crucial in the petrochemical industry to prevent leaks and environmental hazards.
2. Nuclear: Nuclear facilities rely on this testing method to inspect welds in critical systems, where even the smallest defects could have catastrophic consequences.
3. Aerospace: Weld quality in aerospace applications, such as aircraft components and rocket propulsion systems, is essential for safety and reliability.
4. Manufacturing: Inside Corner Vacuum Box Bubble Leak Testing is applied in manufacturing various equipment, including heat exchangers, boilers, and industrial machinery.
5. Infrastructure: The construction of bridges, tunnels, and other infrastructure relies on high-quality welds that can be verified using this technique.
6. Marine: Ensuring the integrity of welds on ship components is vital for seaworthiness and safety in the maritime industry.
7. Automotive: Automotive manufacturers use this testing method to inspect critical welds in vehicle components, such as exhaust systems and fuel tanks.
Proper setup and operation of Inside Corner Vacuum Box Bubble Leak Testing equipment are essential for accurate and reliable weld inspections. Follow these steps to set up the testing process:
1. Select the Right Equipment: Choose a vacuum box that matches the size and type of inside corner welds you intend to inspect. Ensure it is compatible with the specific testing requirements.
2. Safety Precautions: Prioritize safety when working with testing equipment. Wear appropriate personal protective equipment, such as gloves and safety glasses, and ensure proper ventilation in your workspace.
3. Prepare the Weld Area: Clean and prepare the weld area to remove any contaminants, such as oil, grease, and rust, that could interfere with the inspection.
4. Prepare the Liquid Solution: Mix the liquid solution (typically a soapy water mixture) according to the manufacturer's recommendations. Ensure that it is evenly applied and covers the weld area.
5. Position the Vacuum Box: Place the vacuum box over the inside corner weld joint, ensuring it forms a sealed chamber. Seal any gaps or openings to prevent air leakage.
6. Connect the Vacuum Source: Attach a vacuum source to the vacuum box. Ensure that the vacuum source is capable of creating the necessary pressure differential.
7. Start the Vacuum Pump: Turn on the vacuum pump and create a pressure differential within the vacuum box. The pressure reduction will draw gas from any leaks in the weld.
8. Apply the Liquid Solution: Apply the liquid solution to the weld area inside the vacuum box. Be thorough in covering the entire weld joint.
9. Inspect for Bubbles: Carefully inspect the liquid surface for the formation of bubbles. Bubbles indicate gas escaping from leaks or imperfections in the weld.
10. Document Findings: Record and document any defects found during the inspection, including their location, size, and the severity of the issue.
To ensure precise and reliable weld inspections using Inside Corner Vacuum Box Bubble Leak Testing, consider the following tips:
1. Calibration: Regularly calibrate your vacuum box and testing equipment to maintain accuracy in defect detection.
2. Proper Liquid Application: Ensure that the liquid solution is evenly applied to the weld area to prevent false indications.
3. Pressure Differential: Monitor and maintain the correct pressure differential in the vacuum box to ensure consistent and accurate results.
4. Careful Inspection: Conduct a meticulous visual inspection, and if defects are found, follow up with appropriate repairs or further testing as needed.
5. Training: Ensure that personnel conducting the testing are trained and experienced in Inside Corner Vacuum Box Bubble Leak Testing procedures to maximize accuracy.
6. Documentation: Keep detailed records of weld inspections, including photographs and reports, for quality control and future reference.
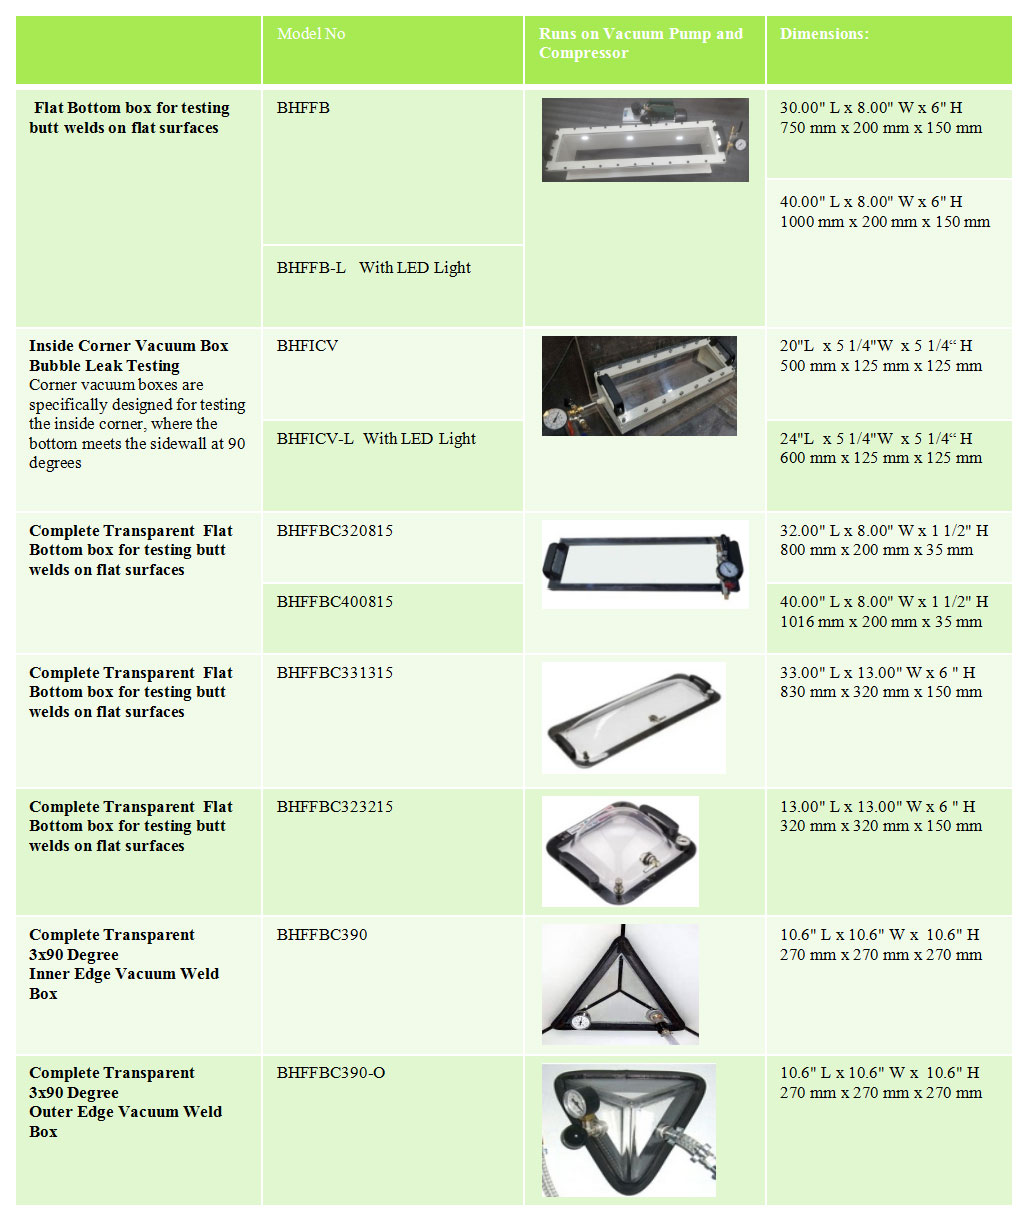
| Model No | Dimensions | ||
|---|---|---|---|
| BHFFB |  |
Flat Bottom box for testing butt welds on flat surfaces | 30.00" L x 6.00" W x 6" H |
| BHFICV |  |
Inside Corner Vacuum Box Bubble Leak Testing Corner vacuum boxes are specifically designed for testing the inside corner, where the bottom meets the sidewall at 90 degrees | 20"L x 5 1/4"W x 5 1/4" H |
| BHFFBC |  |
Complete Transparent Flat Bottom box for testing butt welds on flat surfaces | 30.00" L x 6.00" W x 1/2" H |
Innovation, Quality, Prompt Service, On time delivery.
Aimed at delivering value and achieving complete customer satisfaction.
Expertise is in manufacturing high-quality products.
For all Your Vacuum Chambers,
Vacuum Degassing Chamber, Bubble test Chamber
and Filling machine needs.